Hot Bite

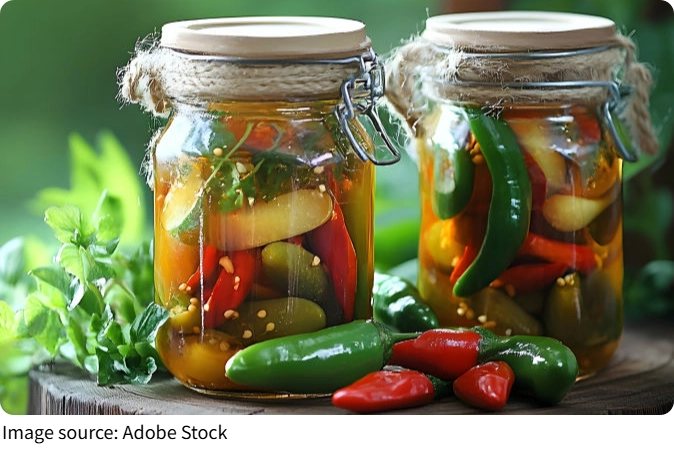
Homemade pickled chili peppers with garlic are more than just a side dish—they're a flavor booster for any meal. Lykkers, unlike store-bought versions, we can control the salt, spice, and garlic levels to suit our taste.
The chilies stay crisp, the garlic adds warmth, and the natural tang makes them perfect for noodles, rice, or cold dishes.
Making a jar at home also means we have a ready-to-go condiment that can last for months, elevating even the simplest meal into something special.
Ingredients We'll Need
- Fresh autumn chili peppers: 10 pounds (about 4.5 kg)
- Garlic: 2 pounds (about 900 g), peeled
- Ginger: 2 pounds (about 900 g), peeled and sliced thin
- Sugar: 250 g
- Salt: 1,000 g (adjust slightly for longer storage)
- Cooked vegetable oil: 750 g
- Raw vegetable oil: 750 g
- Cooked soy sauce: 750 g
- Raw soy sauce: 750 g
Lykkers, this quantity is for a large batch. For smaller households, you can halve the amounts without affecting taste.
Steps To Make It
Step 1: Prepare the Chilies
1. Wash the chilies under cold water and remove any dirt.
2. Air-dry completely; moisture can make them soft later.
3. Remove the stems, slice each chili in half, and scoop out the seeds.
This step is crucial for crispness. Lykkers, don't skip it—well-prepped chilies absorb the seasonings better and stay crunchy.
Step 2: Prep Garlic and Ginger
1. Peel garlic cloves and cut each in half.
2. Peel ginger and slice into thin pieces.
These aromatics are key for flavor. Lykkers, the slices don't need to be perfect—just roughly even so they mix well with the chilies. Their aroma will slowly infuse the chilies during marination.
Step 3: Mix Seasonings
1. In a large bowl, combine sugar, salt.
2. Add garlic, ginger, and prepared chilies.
3. Pour in the raw and cooked oils and soy sauces (except the portion we'll heat later).
4. Stir thoroughly until every chili is coated.
Lykkers, this ensures the seasoning is evenly distributed, so every bite has balanced flavor.
Step 4: Heat Oil and Soy Sauce
1. In a pan, pour the remaining oils and soy sauces.
2. Heat gently until just bubbling—do not overheat.
3. Let the mixture cool completely.
Once cooled, pour it over the chili mixture and stir again. Lykkers, this adds depth to the flavor and a slightly rich aroma that makes the pickles irresistible.
Step 5: Marinate the Chilies
1. Let the chili mixture sit at room temperature for 30 minutes.
2. Transfer everything into a clean glass jar, pressing gently to remove air pockets.
3. Seal the jar and leave it for 3–5 days.
The chilies will be ready when they are crisp, aromatic, and slightly tangy. Lykkers, patience is key—the longer the chilies sit, the more the flavors develop.
Step 6: Tips for the Perfect Pickle
- For longer storage, slightly increase the salt.
- Only use autumn chilies—they are firmer and naturally flavorful.
- The juice in the jar is a flavor powerhouse—scoop some over noodles, rice, or cold dishes.
- If making smaller batches, simply halve the ingredients; taste remains consistent.
- Avoid moisture in storage; always use a clean, dry jar.
Lykkers, these little details make the difference between good pickles and extraordinary ones.
Step 7: Serving Suggestions
The pickles aren't just for noodles or rice. Lykkers, try them with sandwiches, or even as a topping for salads. The crisp texture and garlicky spice elevate ordinary dishes instantly. A couple of spoonfuls can transform a simple meal into a comforting, flavorful experience.
Enjoy Your Crunchy Creation!
Making homemade pickled chili peppers with garlic may take some time, but it's simple if we follow each step carefully. Lykkers, with fresh ingredients, proper preparation, and a bit of patience, we can enjoy a crunchy, spicy, and aromatic condiment that lasts for months.
It's a small kitchen project with big rewards—every bite brings homemade goodness to our table. So grab your chilies, garlic, and ginger, and let's create a jar of pure deliciousness together!